

Installation
Bootstrap the Instance
Download the ARTESCA Operating System ISO (
artesca-os.iso) file from https://downloads.scality.com/artesca-plus-veeam-preview/files/os/artesca-os.iso.Boot the instance using the
artesca-os.isofile.
Deploy the Operating System
Run the virtual machine and choose Install ARTESCA OS.

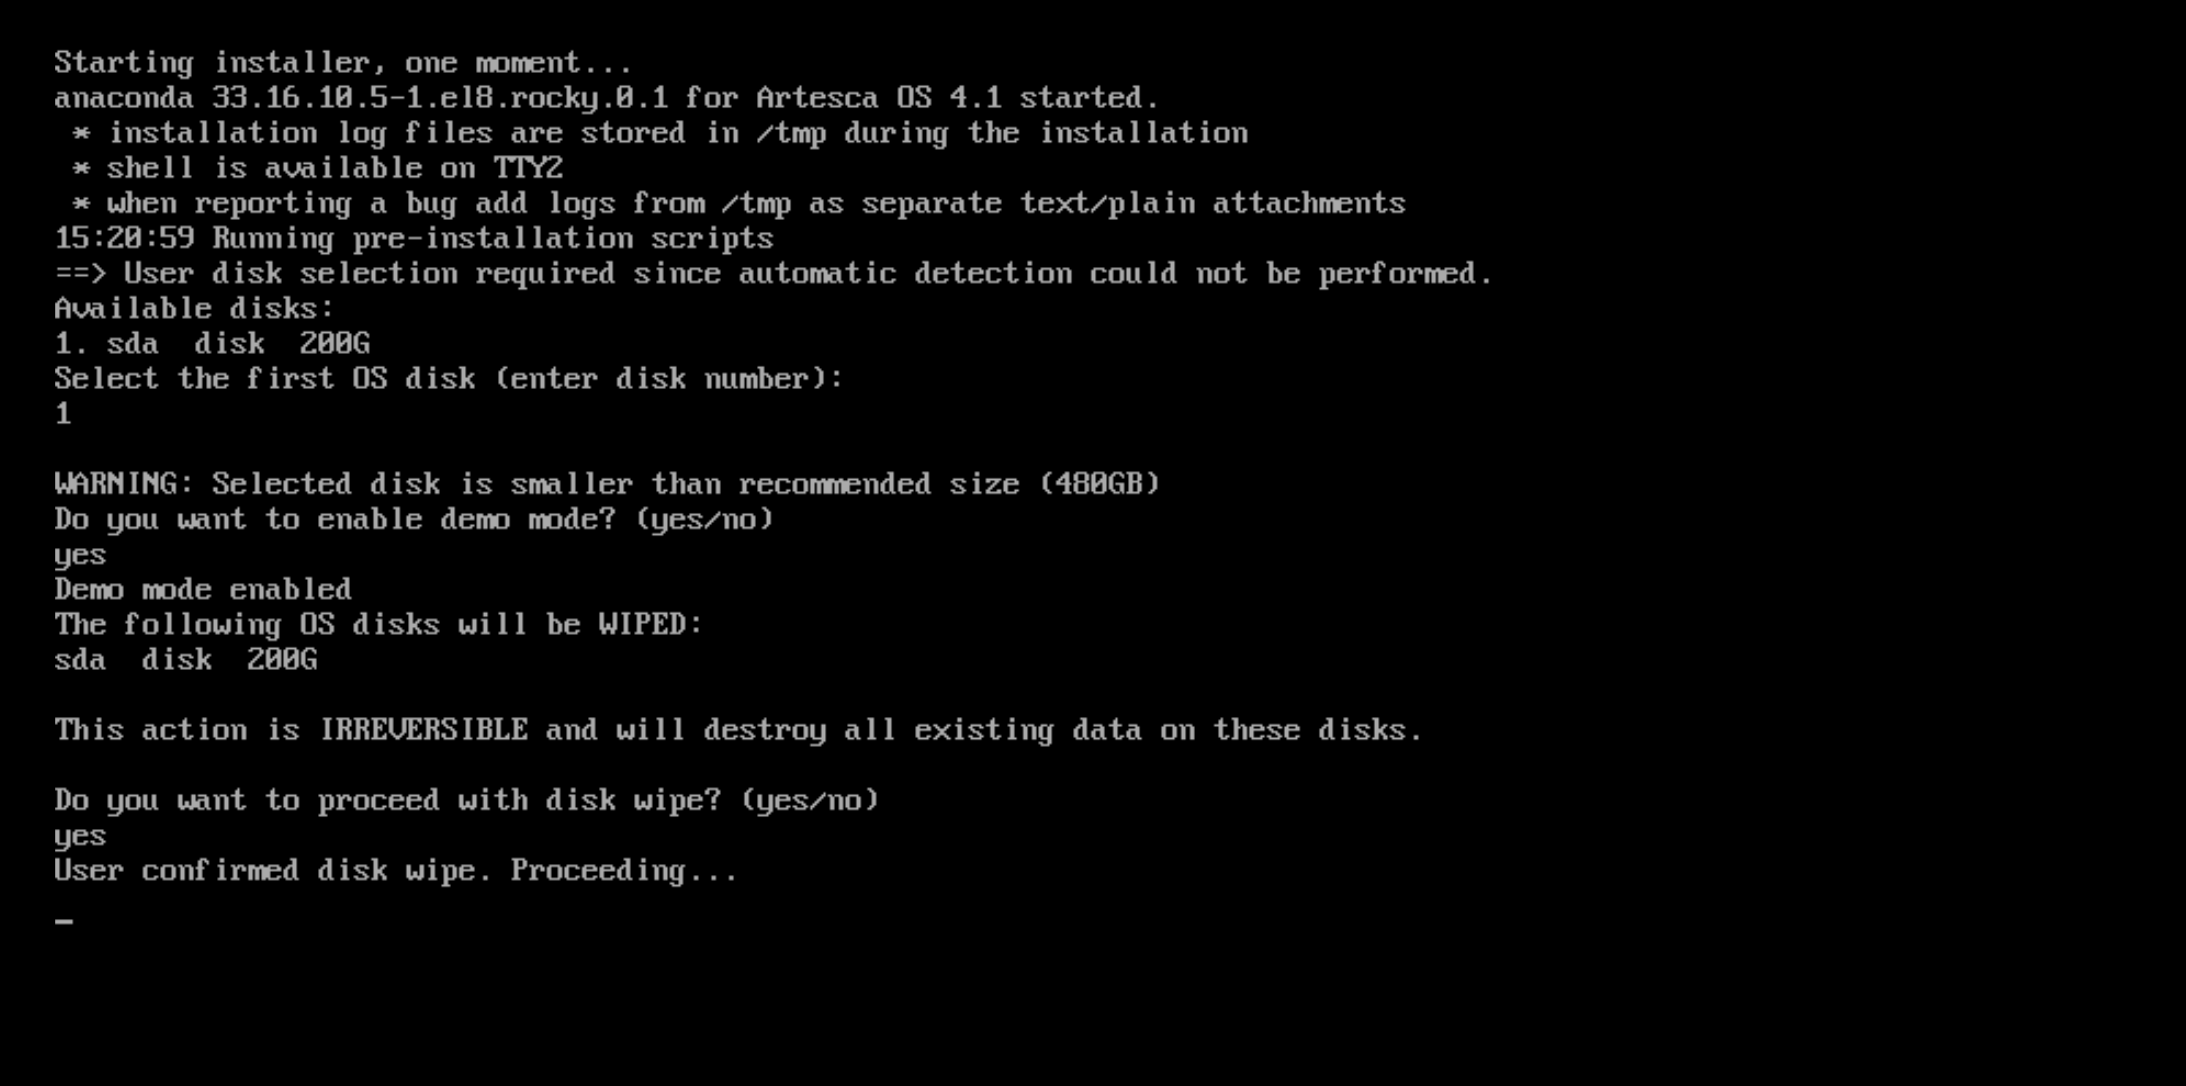
Select and wipe the ARTESCA OS disk
Configure the Keyboard setting to the language of your choice.

Configure the Time & Date settings and ensure the NTP server is reachable.
Note
You can leave the Network & Host Name settings as default (using DHCP) as soon as the IP does not change after the reboot.
Click Begin Installation once all settings are configured.
Click Reboot System once the installation is complete.

Connect to the installer using ssh with the default credentials artesca-os / scality. You will be prompted to change the password on first login.
Download Artifacts
You must have an Internet connection to download artifacts.
Download the ARTESCA installer to the
/home/artesca-osdirectory.[artesca-os@bootstrap ~]$rm -rf artesca-installer SHA256SUM \ && curl -s --fail -Lo artesca-installer \ https://downloads.scality.com/artesca-plus-veeam-preview/files/artifacts/artesca-installer \ && curl -s --fail -Lo SHA256SUM \ https://downloads.scality.com/artesca-plus-veeam-preview/files/artifacts/SHA256SUM \ && sha256sum -c SHA256SUM \ && chmod +x artesca-installer
artesca-installer: OK
Download the component artifacts.
[artesca-os@bootstrap ~]$sudo ./artesca-installer get --url https://downloads.scality.com/artesca-plus-veeam-preview/files/artifacts
Configure ARTESCA Installer
Configure the installer based on the static IP(s) of the server(s) previously defined and the base domain that will be used to expose the s3 endpoint.
Generate a functional configuration file.
When asked for the IP to use for the Management UI, use the IP of the instance.
[artesca-os@bootstrap ~]$sudo ./artesca-installer config generate \ --output config.yaml \ --enable-artesca-plus \ --architecture single-node \ --profile demo \ --ipip-always
Set the CIDR variable based on the server static IP.
[artesca-os@bootstrap ~]$NETWORK_CIDR=<NETWORK_CIDR>Tip
Replace
<NETWORK_CIDR>with the network address of your network interface in CIDR notation. For example, if your static IP is10.200.32.1, put10.200.0.0/16.Set a variable with your base domain.
[artesca-os@bootstrap ~]$BASE_DOMAIN=<BASE_DOMAIN>Tip
Replace
<BASE_DOMAIN>with the domain name suffix you want to use to reach the s3 endpoint. For example, if you want the s3 endpoint to be reached froms3.my-company.com, usemy-company.com.You can replace
my-company.comwith the base domain name you want, it will be used as suffix for all DNS names as described in General DNS Setup.Generate a functional configuration file.
[artesca-os@bootstrap ~]$sudo ./artesca-installer config generate \ --output config.yaml \ --architecture single-node \ --profile demo \ --base-domain "$BASE_DOMAIN" \ --control-plane-cidr "$NETWORK_CIDR" \ --workload-plane-cidr "$NETWORK_CIDR"[artesca-os@bootstrap ~]$sudo ./artesca-installer config generate \ --output config.yaml \ --architecture 3-nodes \ --profile demo \ --base-domain "$BASE_DOMAIN" \ --control-plane-cidr "$NETWORK_CIDR" \ --workload-plane-cidr "$NETWORK_CIDR" \ --ipip-always \ --node '{host: <node 2 IP>}' \ --node '{host: <node 3 IP>}'[artesca-os@bootstrap ~]$sudo ./artesca-installer config generate \ --output config.yaml \ --architecture 6-nodes \ --profile demo \ --base-domain "$BASE_DOMAIN" \ --control-plane-cidr "$NETWORK_CIDR" \ --workload-plane-cidr "$NETWORK_CIDR" \ --ipip-always \ --node '{host: <node 2 IP>}' \ --node '{host: <node 3 IP>}' \ --node '{host: <node 4 IP>}' \ --node '{host: <node 5 IP>}' \ --node '{host: <node 6 IP>}'
If you use the default login credentials (
scality/password) you are prompted to update your password after your fist login. Refer to Next steps for more information.If you do not use the default login credentials, the installer prompts you to enter the required information for the ARTESCA Admin:
username,email address,first nameandlast name. (These credentials are not related to your Scality account).
Deploy ARTESCA
[artesca-os@bootstrap ~]$
sudo ./artesca-installer deploy -c config.yaml
Next Steps
Continue with the ARTESCA Post-Installation Guidelines.
Continue the installation with Install the Windows Virtual Machine.
Continue the installation with Install the Veeam Software Appliance.


